.png)
My Seed Starting Process (Part 1)
- willowandpinellc
- Mar 1, 2024
- 6 min read

Happy March 1st! The turn of the calendar page from February into March really makes me feel like spring is finally on its way. The tulips and daffodils are bursting out of the ground after their winter slumber, the fall planted crops are greening up, and seed starting is well underway here on the farm.
Seed starting has a special place in my heart as things get moving for the year after a winter respite. There is so much promise and excitement as I meticulously sow each seed. While I love getting outside in the sunshine and digging in the soil, there is something to be said for the ability to stay clean, warm, dry, and out of the wind while doing early spring farm work!
One of the most common questions I get from people when I tell them that I grow 99(ish)% of my flowers from seed/bulb/tuber, is: "So do you have a greenhouse?". And my answer is: "Actually, no, I don't!". What I do have is a bathroom packed with shelves, grow lights, and happy little seedlings. Honestly, it's my favorite room in the house this time of year. It is warm, bright, filled with plants, and smells like warm soil (one of my favorite smells!). At present, I have well over 5,000 little plant babies growing or germinating in there. Who needs the expense of a greenhouse when you can pack so much into a space you already have!?
It takes a bit of planning, trial and error, and upfront expenses to make this possible, but over time I have refined my process for starting seeds indoors before planting them outside.
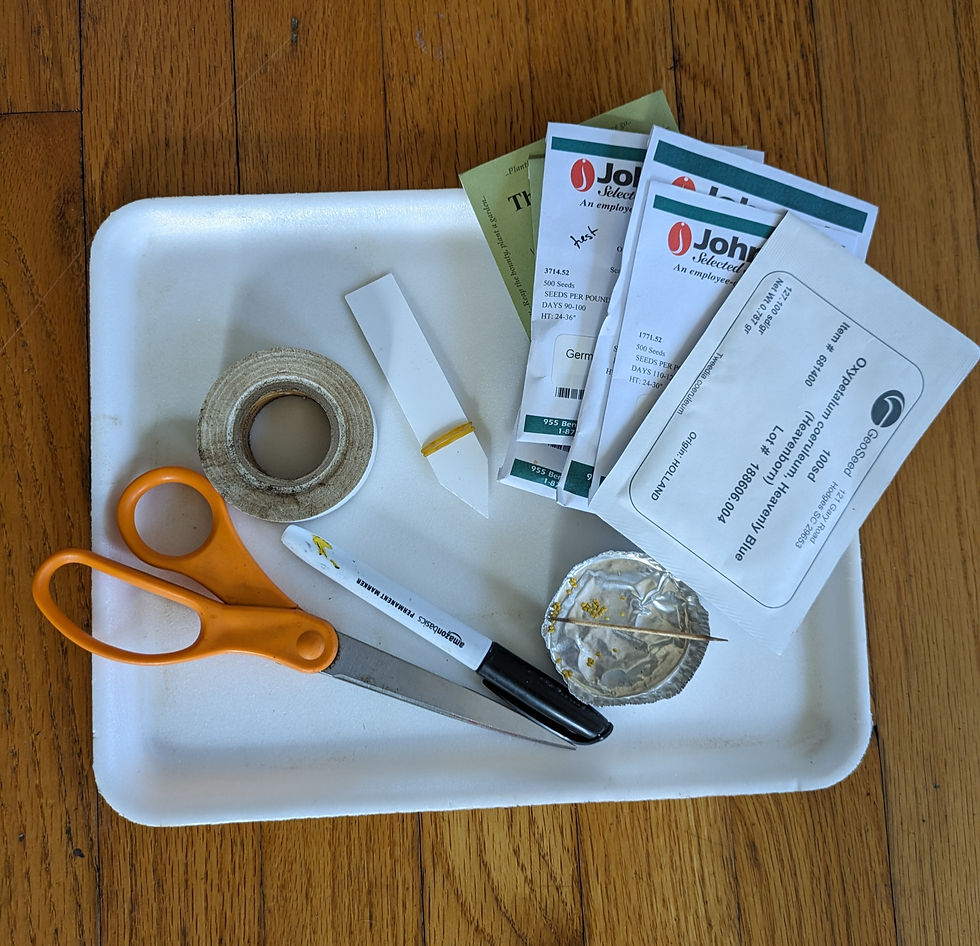
The first order of business is to order good quality seed. I source the vast majority of my seeds from GeoSeed (a wholesale supplier for commercial growers) and Johnny's Selected Seeds (supplier for home and commercial growers), with a select few extra flowers sourced from The Gardener's Workshop and Floret.
The majority of flower seeds are quite small and require a bit of meticulous handling to sow them with precision. One option is to sprinkle the seeds to over-sow and thin them out later (like I do with direct sowing outside), but I prefer to plant each seed individually when starting trays indoors. I use the little aluminum dish to hold the seeds, and then pick the seeds up one by one with a slightly dampened toothpick and gently press them into the planting medium. It seems like a crazy-tedious method, but once you get the hang of it, it goes rather quickly! Larger seeds are sown slightly differently, but I will get into that a little later in this post.
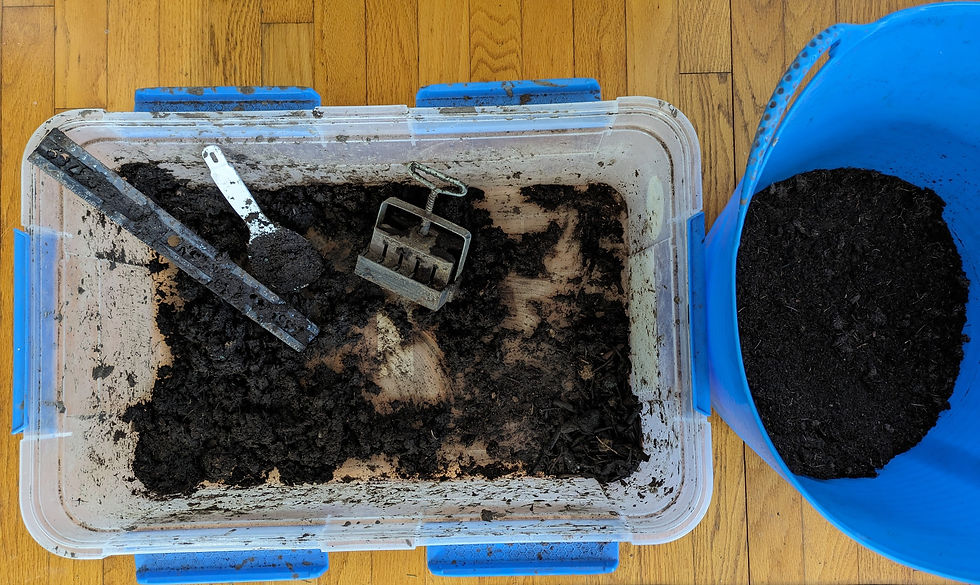
The real key to fitting so many little seedlings into my bathroom, is that I predominately utilize soil blocks rather than the traditional cell packs or pots. Using a custom made soil blocking mix and a 20 cell soil blocker (the contraption pictured in the middle of the bin), I can start 240 little seedlings on a 12" x "24" tray.
My blocking mix consists of 4 parts peat moss (though I'm looking into experimenting with some more sustainable and earth-friendly substitutes like wool or other fiber blends), 1 part compost, 1/2 part rock phosphate, and 1/2 part green sand. The peat moss and compost both need to be sifted before using this small soil blocker or it will get jammed up with the larger sticks, bark, and rocks that are sometimes found in those components. Then mix the 4 ingredients together dry and then add enough water until it is quite wet, basically just to the point where it no longer absorbs any more water.
I then press the soil blocker down into the mixture to pack each cell, before turning it over to press the soil in a bit more with my handy dandy ruler and then scrape it level with the ruler's edge. Finally, I squeeze the blocks out onto the tray, either 12 blocks (240 individual cells) on my larger trays or 5 blocks (100 individual cells) on my smaller, depending on how many flowers I want of a certain variety. While it may feel tempting to mix and match flower types and varieties on a tray to save space, I have found that it is best to stick to one type of flower per tray (though sometimes I'll do 2-3 different colors of the same flower), because differing germination times, growth rates, and plant sizes make it difficult to keep all the seedlings happy on the same tray.

As mentioned earlier, there are a few flowers that I have found are better suited for sowing in cell packs rather than soil blocks. Some seeds like calendula, carthamus, or some cosmos are too large to sow into the tiny cell blocks. Sweet peas (also large seeds) don't like to have their roots disturbed and prefer a larger amount of soil to be established in before planting out. Other plants like dara have a predominant taproot that prefers a deeper amount of soil as well. If the seeds are small, I simply sprinkle them into the cell packs filled with damp seed starting mix (my favorite mix here), and press them firmly into the soil. Larger seeds, I typically push in a bit deeper and cover them with soil.
I have learned the hard way over the years that my memory alone is an insufficient system to keep track of what plant is what by the time we go from seed to harvest! Labeling is important! I use a permanent marker on electrical tape to write the plant variety and color and then put that label on each tray. When it comes time to plant the seedlings outside, I then peel off that tape and stick it to a plastic plant tag to mark the plants in the field. I've found that if I write directly on label (even with the fancy label marker!), the words tend to fade by the end of the season, but using the electrical tape helps me save time by using a label from trays and the ink doesn't fade outside over time.
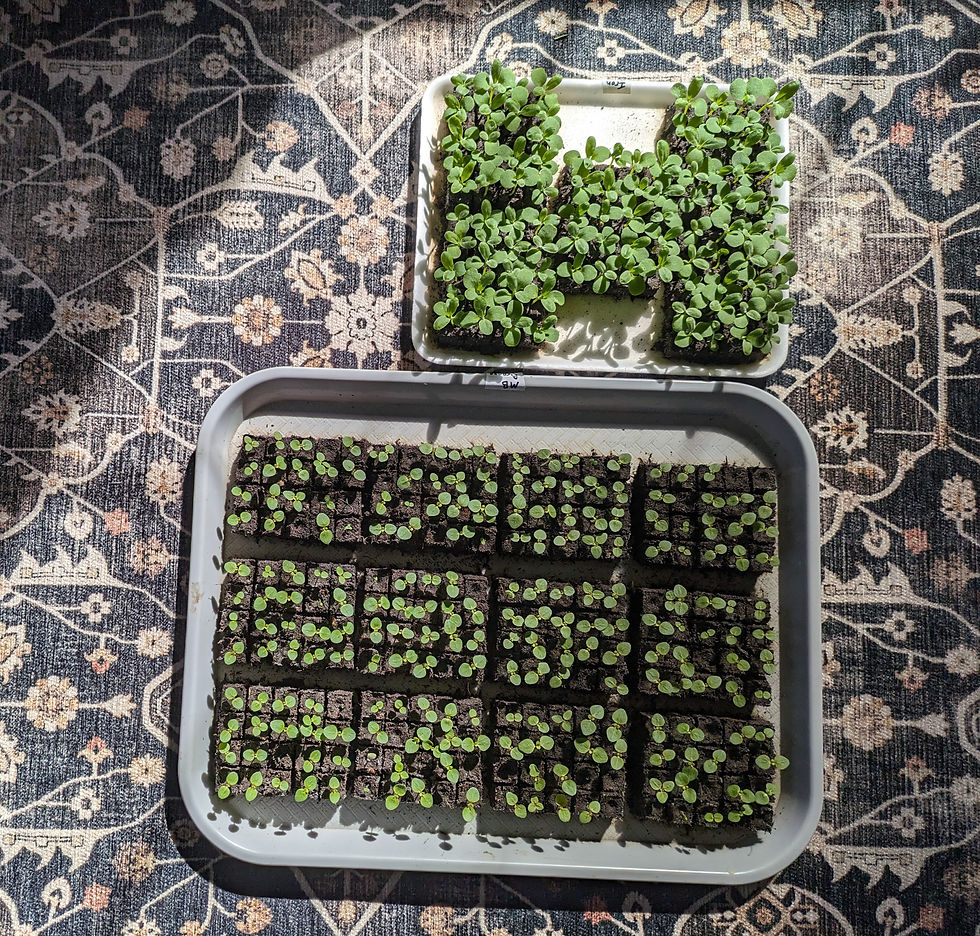
Once the trays are seeded and labeled, it's time to get these babies growing! Most trays go directly onto the heat mat to germinate, but not all seeds respond well to those warmer temperatures. It is important to read the package or do your research to know the care your individual seeds need to thrive. For example, snapdragons don't need the extra warmth of the heat mat to germinate. I just pop them on the top shelf in the bathroom and check them every day or so until they germinate (just barely cracked open!) and then I put them under the grow lights. Other seeds may even require a few weeks of refrigeration (to simulate winter temperatures) before sowing if you want good germination, so read the packages ahead of time as to not be caught off guard!
Even before the seeds germinate, you will need to water the soil block trays every single day (the cell packs maybe every other day). You do not want them to dry out and get too hot! Pour water gently into the tray, NOT on top of the soil blocks. Before there is root growth, the blocks can be a bit fragile and you don't want to disturb them. I typically pour enough water into the tray so that water is touching half of the soil blocks, let it absorb, rotate the tray 180 degrees, and then water the other half of the tray. Make sure that all blocks are fully wet, but then drain off any excess water. To prevent the soil blocks from drying out too quickly on the heat mat, I place burlap over each tray or use plastic dome on the cell pack trays.
Once about 50% of the seeds have germinated, I remove the trays from the heat mat and put them under the grow lights. At this point I remove the burlap, since it is laying directly on the soil blocks, but I typically leave the plastic domes on the larger cell pack trays until all the seeds have germinated and put on a little growth. Most seed packages are labeled with seed germination rates, giving you the expected percentage of your seeds that should successfully germinate when given proper care. Typically these numbers are in the mid to upper 90's, but occasionally this number is lower, so check back on the label if you feel like your rate wasn't a resounding success. If the labeled number is lower than 85%, I have plenty of seeds, and they weren't expensive, I'll often be a bit more generous on my seeds per cell to ensure that I have at least one plant per cell in the end (thinning down to 1 plant if more than 1 does grow).
Not to abruptly cut you off, as things are just getting interesting, but check back in a week or so for a Part 2 on how to keep those little plant babies thriving! Happy sowing and feel free to comment with any questions on the process so far!
Comments